Aug 15, 2022
Welcome to the SOBS School Calendar application. Let’s begin by looking at the overall structure of the application.
General Structure
The structure of the Sobs Calendar application is somewhat different to many calendaring systems. While Google and Outlook set up different calendars for different people and groups Sobs uses a single calendar and distinguishes events based on the category selected. Every event on the calendar must have a category, and so the category defines the type of event. Some categories may have a broad scope, such as “All-school events”, whereas others may target only a small group of people. An event in a broad category would generally be visible to everybody using the calendar, and at times may be defined as a public event which would be visible to the general public as well. An event valid for a small group of people would typically only be visible to those people. The ability to add events, approve events and view events can all be defined within the Category permission settings, allowing some categories to be visible to everybody, and other categories to only be visible to a small group of staff.
Categories are significant and therefore the first areas that we should consider when setting up our Sobs Calendar application. You can have as many categories as your wish, however to avoid events being placed in the wrong category we suggest you plan these categories carefully to avoid staff selecting the wrong categories. Also consider who can add events to a particular category, who can approve events (if required), and who the events should be visible by.
There is a special category we call “SPAR” (Staff Planned Absence Register) which can help manage your staff planned absences. Generally all staff can add an event into a SPAR category, however there may be some lead-time requirements (eg staff must add a SPAR event a number of days prior to the absence in order to allow the DP to assign cover).
Add a category
- Log into SOBS as a SOBS Administrator
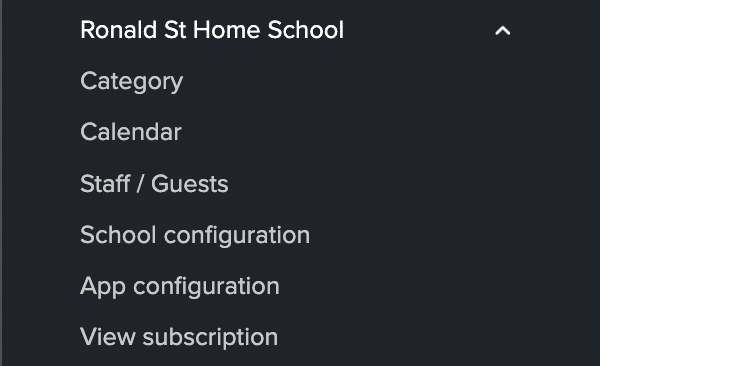
- Click on your school name (bottom left) and then on”Category”
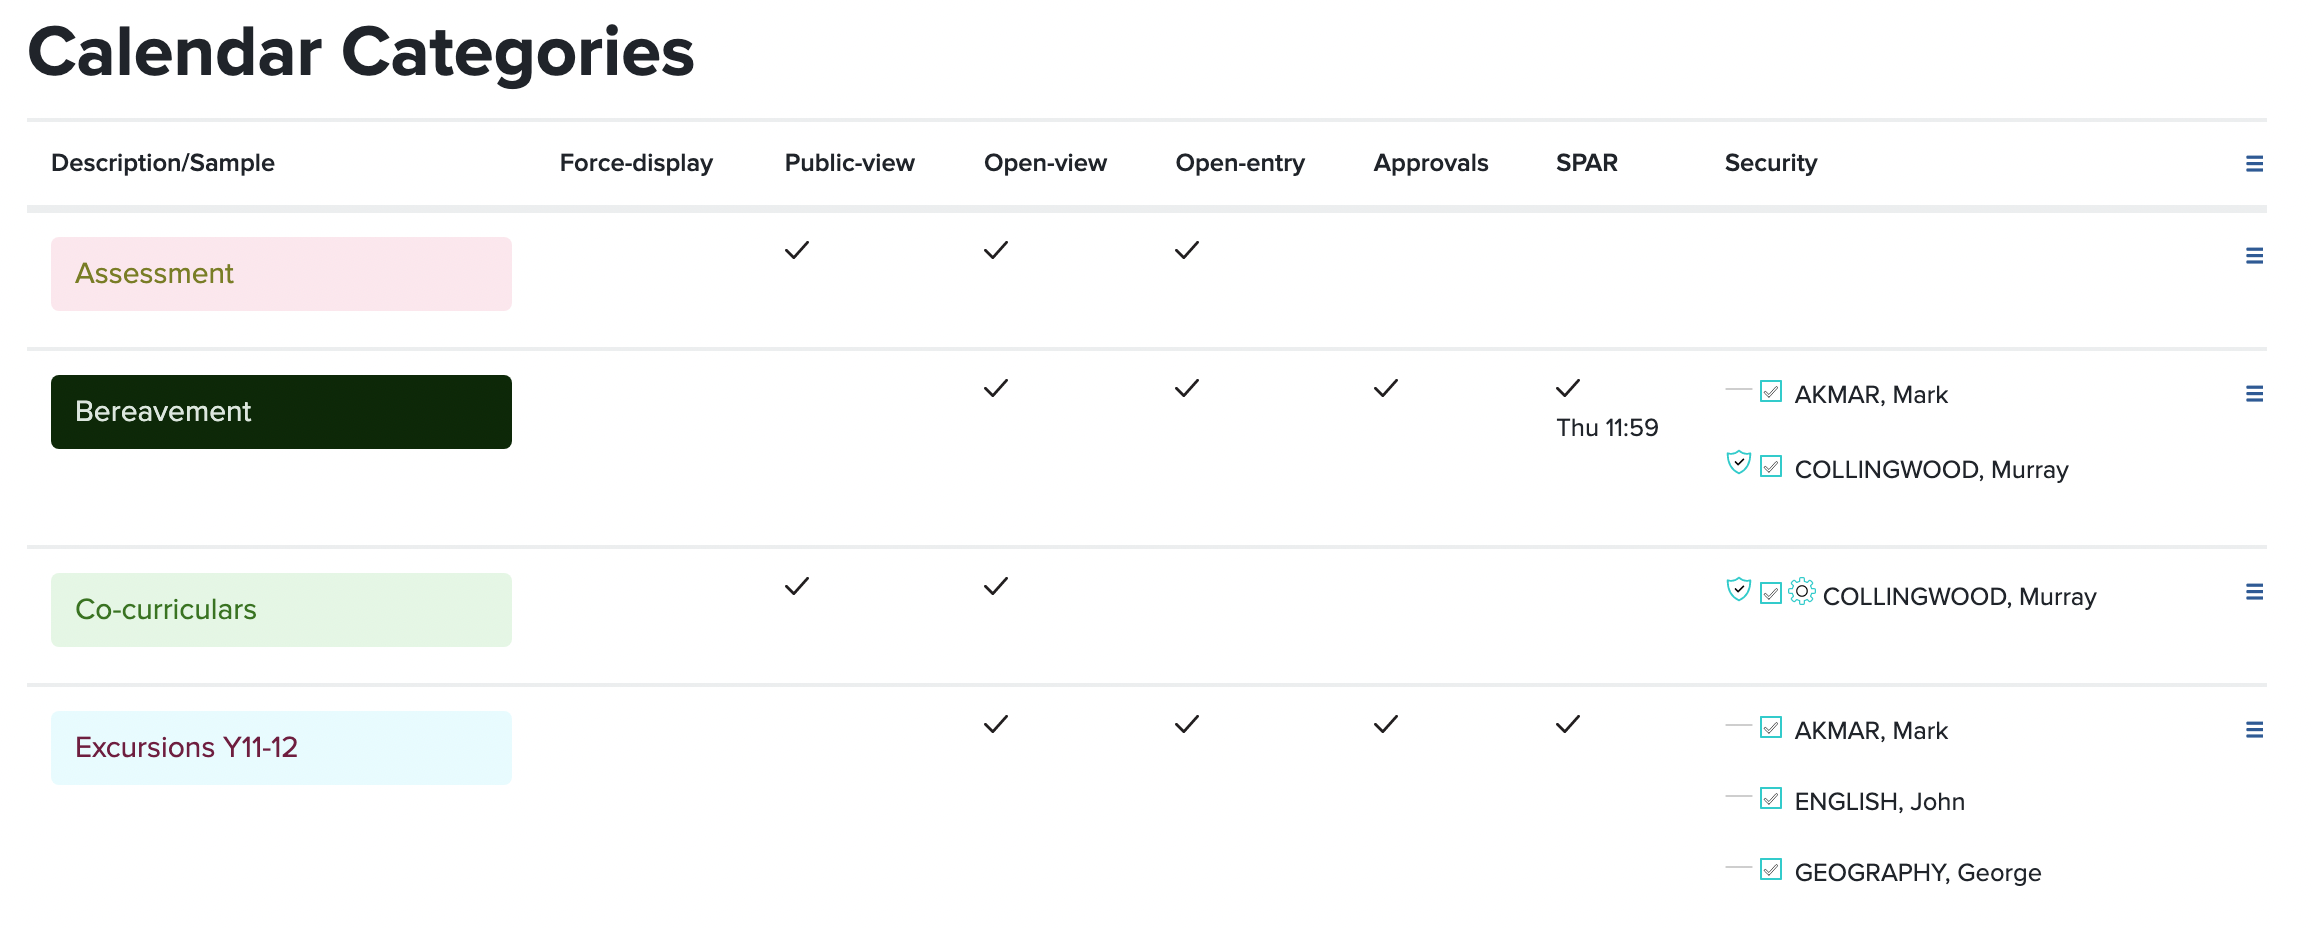
- This will display the Category management page. Use the “Add category” button or the menu (top right of table) to add a new category.

- The description is the category name that staff will select. You can of course come back and change these names later if required.
The colours define the foreground and background colours when the event is displayed on the calendar. Please do not use a white background, as the duration of an event is visible based on the background colour.
The other options are explained below.

Force Display: With this option selected events in this category will always appear on the users calendar.Open View: Events in this category will be visible to all staff. This is a good default option. If you have this unchecked on a category then the staff member will need to be expressly mentioned in the list of staff who can view events in this category – further details on specific permissions are below. With the Open View option checked the system will not check for any specific security to view these events.Public View: Use this option on a category that should be visible to the parents, students and friends of the school.
Open Entry: Allow any staff member to add events in this category. Without this option checked you will be required to select specific staff who will have the ability to add, update and delete events from the category. Only people logged into SOBS will be able to add events – the public view of the calendar does not allow any addition or modifications of events.
Approval Required: This can be used in conjunction with ‘Open Entry’ to allow staff to enter events in a category, but the events must be approved before they are visible to other staff (or public if that option is enabled for the category). The pending event is displayed with a red-dash border and is only visible to the person who entered the event and the staff who area authorised to approve.
SPAR: Stands for ‘Staff Planned Absence Register’. It designates some special processing in regard to events that relate to planned staff absence. Ensuring that appropriate notice is provided, the amount of cover required is identified, and how the cover is being funded.
- After you have added a number of categories your list may begin to look like this:
Setting Permissions
General categories such as “All-school events” and sporting events won’t require many permissions, although you may wish to use the approval process to ensure these events are approved for inclusion in the calendar. However when we begin defining categories for use by specific groups in your school, the permissions will become very important. For example let’s consider a category called “Executive” which we might use to define the school executive team gatherings. When we add this category we find that many of the check-box options don’t apply, and that is fine. Now we can use “Edit permissions” from the right hand menu to define who can use this category.
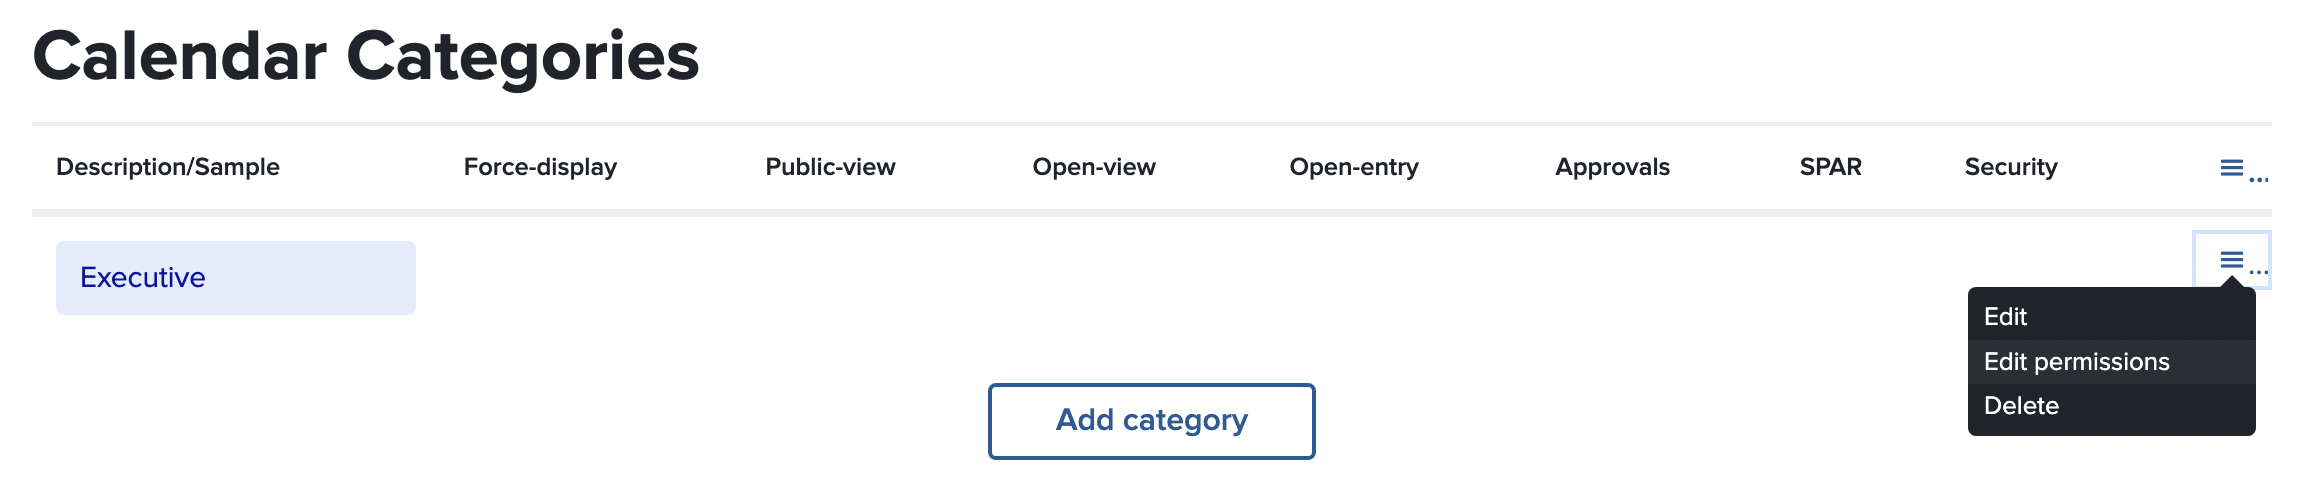
Clicking on the “Edit permissions” menu entry will display a list of all current staff and a series of checkboxes to include the specified staff.

As you can see from this table (above) we are able to select all the staff that can view the events in this category. In addition we have two people capable of approving new events and one person who manages these permissions.
Identifying the school terms and holidays
The calendar will work better when we understand the school terms and holidays. If you haven’t already configured the terms within SOBS, then do that now. Please see this help article
Adding an event
To add events click on ‘My calendar’ in the left hand menu – this should display a calendar view with the current week and the next 3 weeks. The date is displayed in a button on each day, when you mouse over the date a button will appear. (On a mobile device simply touch the date.) Today’s date is indicated with a green border.
Mousing over a date will display an “Add event” button.

When adding an event you will be prompted with a list of categories to select from. This list will only include categories valid for your user account to select from. If you can not see a Category listed then it is probably not ‘Open Entry’, or your login does not have the permission to add events to that Category.

With the category selected we then complete the remainder of the event detail, including a title, date and time range (if required), event repetition, and any contact information I would like to include.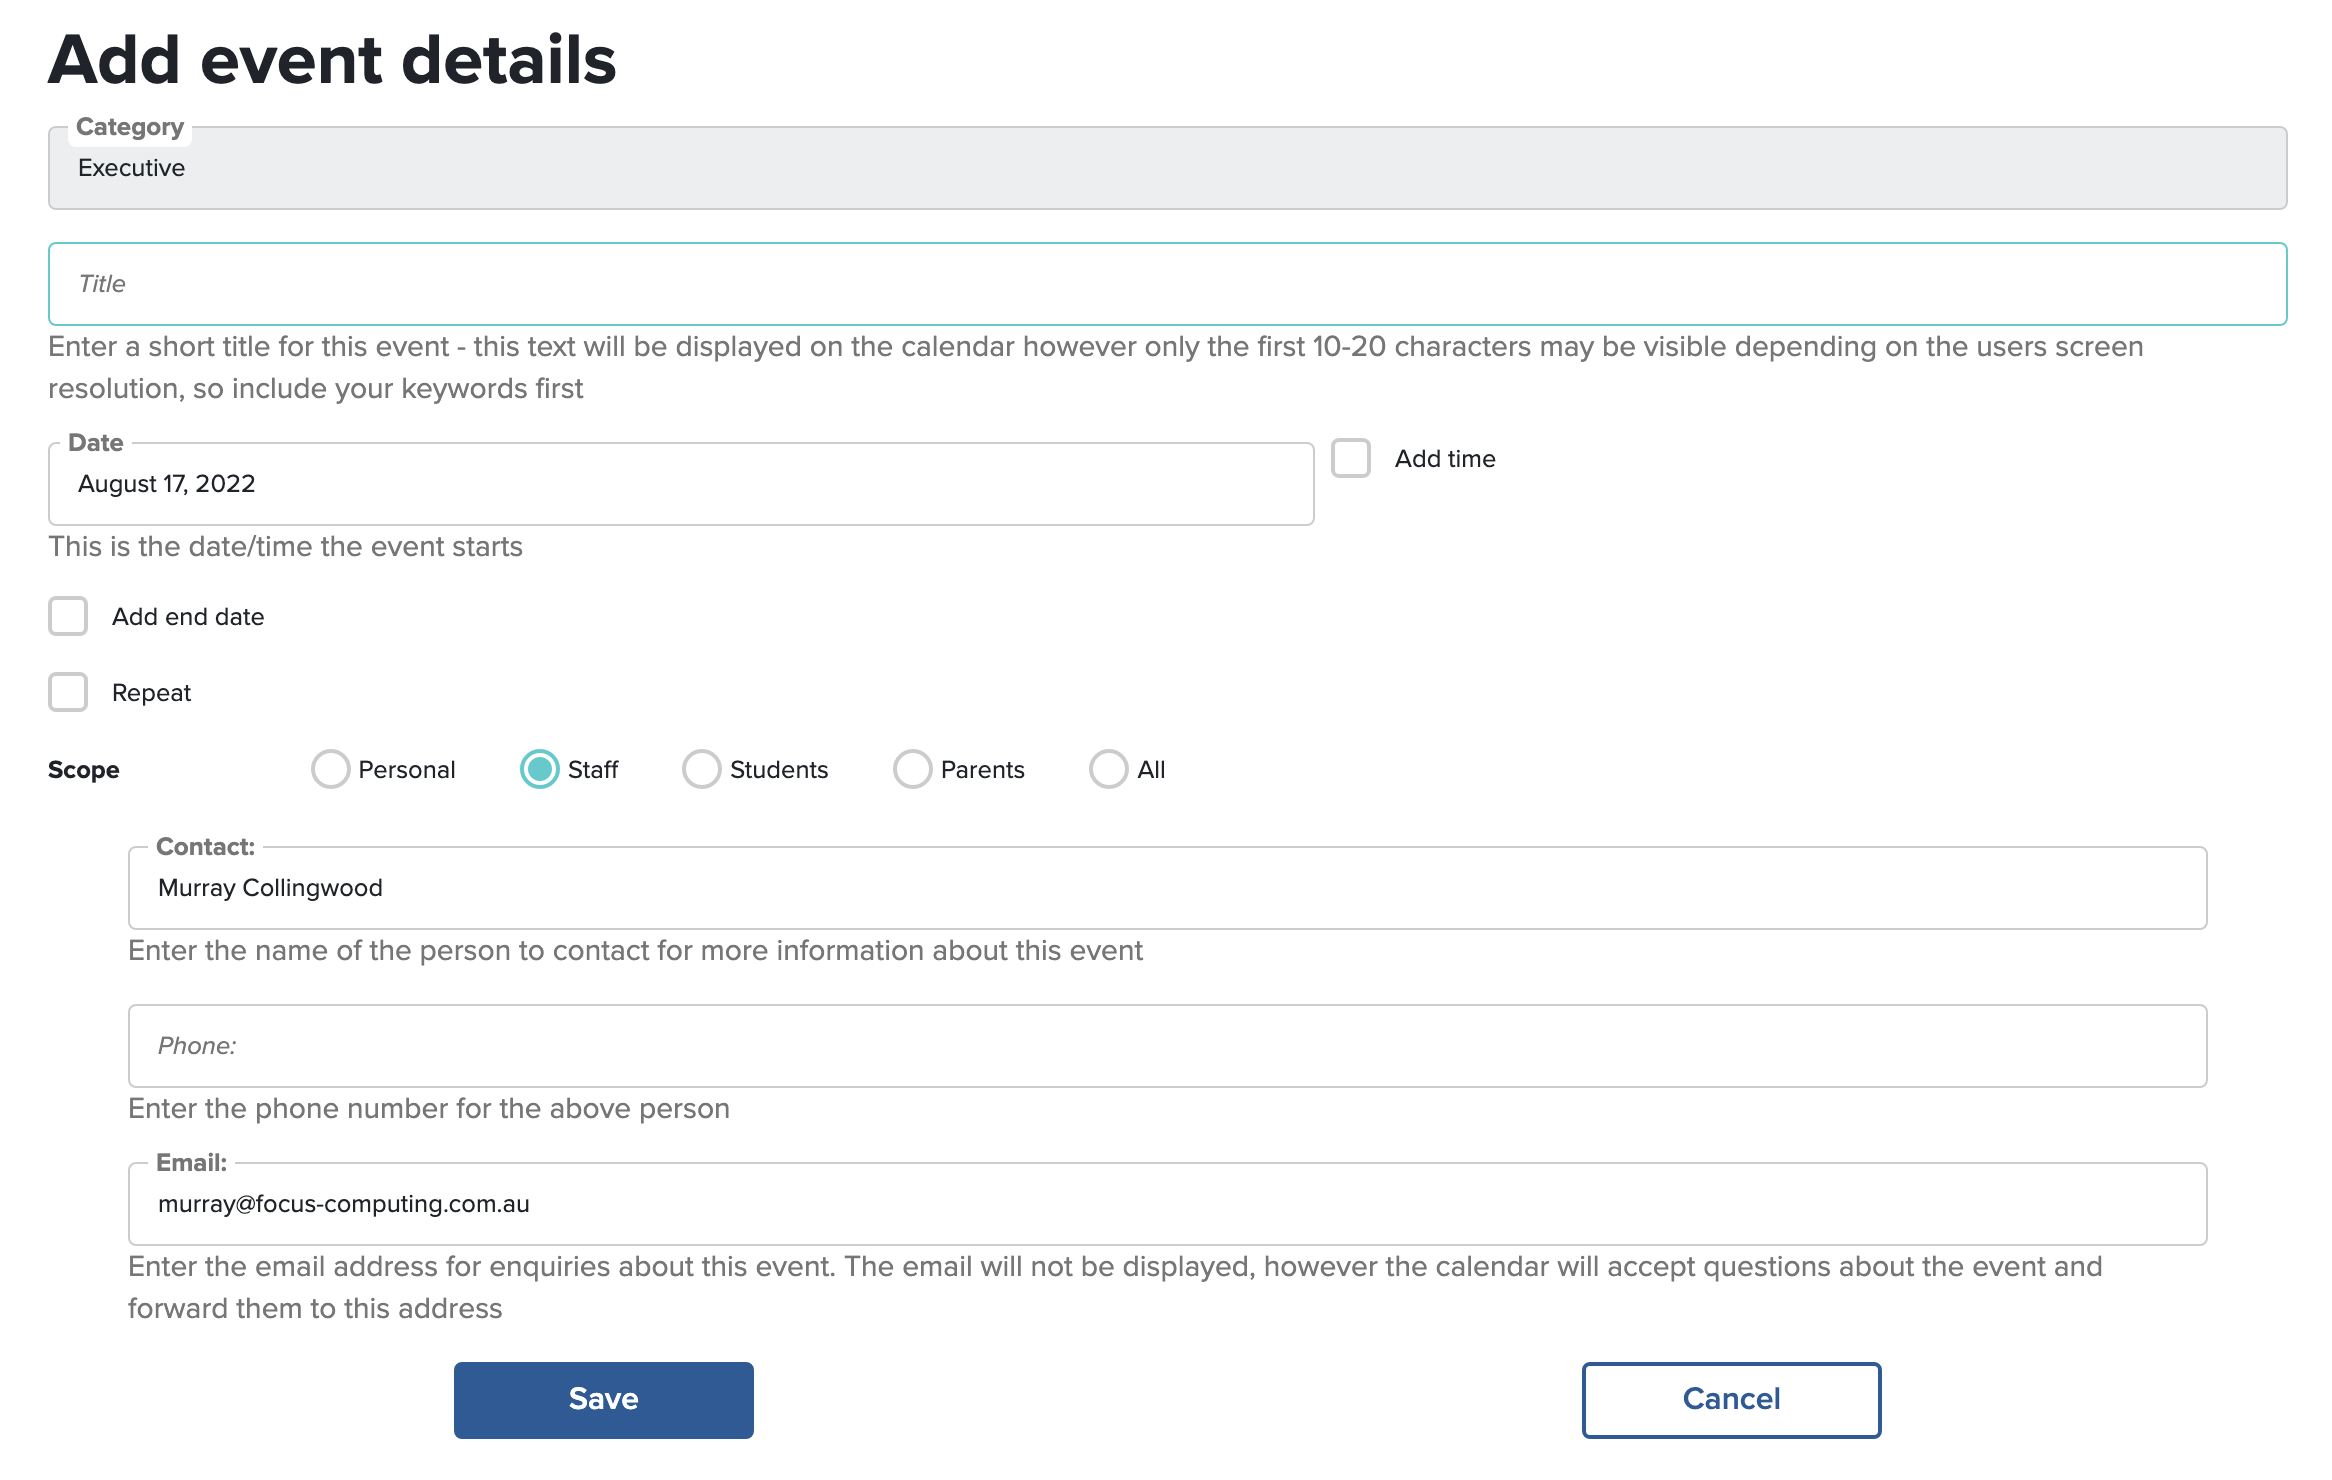
When saved the event will immediately appear on my calendar. Clicking on the event will display any additional information that I entered. The blue left hand border indicates this is an event that I entered. 
Where to from here
We hope this article has been helpful. We encourage you to jump in and have a go and configuring your categories and adding some events. If you have any additional questions please use the support tab, “?”, on the top right of the screen.