Jan 23, 2018
There are two ways of using the Student Attendance Register. You can use it to mark rolls and process absence notifications, or you can import absence information and process the notifications. Either use requires some information to be loaded, essentially student and parent information, optionally class information.
Student and Parent information
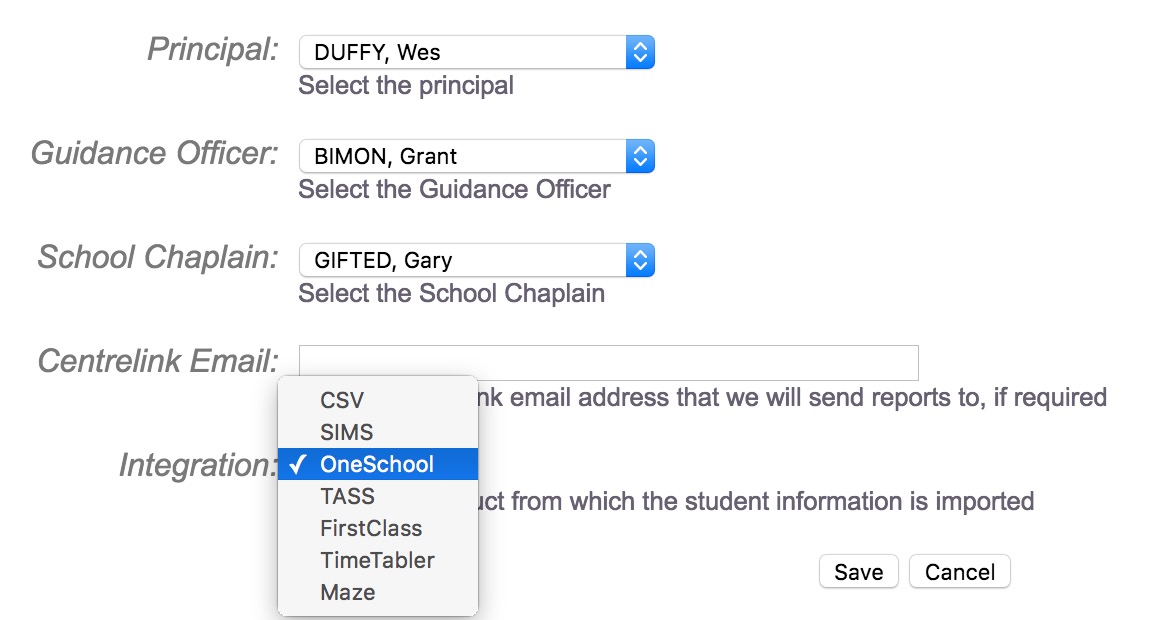
You should import your student and parent information from your Student Management (SM) system. We have a number of supported import formats for different SM systems, select yours on the ‘School Settings’ page and the ‘SAR’ tab.
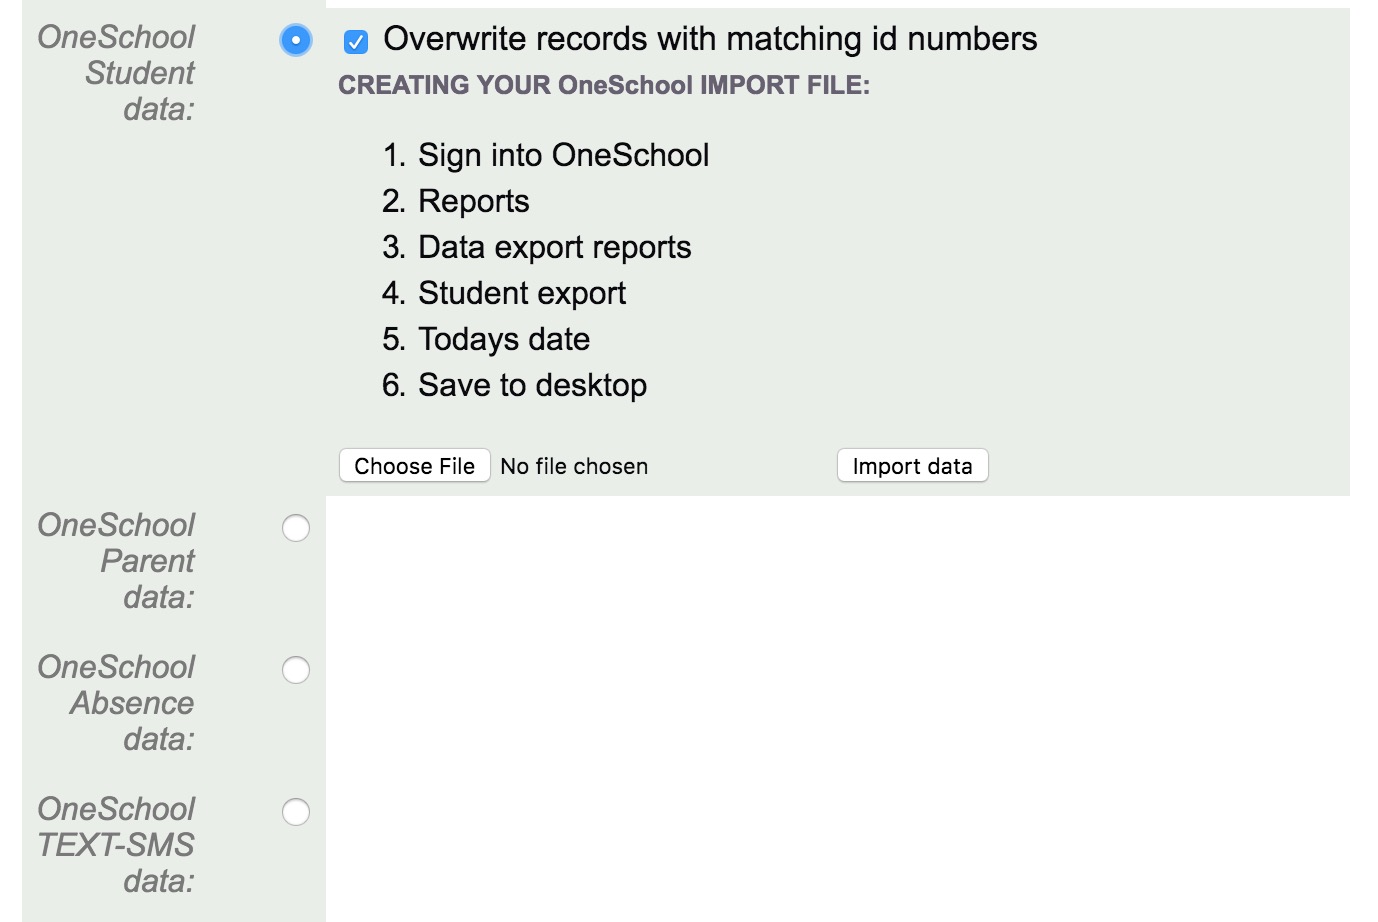 After selecting your SM system go to the ‘Import/Export’ page and options for importing from your SM system will now be visible. Clicking the import option may/may-not display additional help on how to generate the export file from your SM system – if the help is missing and you are able to help other schools by providing helpful instructions please email those to us and we will insert them. If the instructions are there then follow those to generate your export file. Then import this file to Sobs.
You will need to import Student information and Parent information. Optionally (if using the online roll marking) you should also import classes.
Sobs stores students with two parent contacts. We refer to these as parent-1 and parent-2. We use the word parent and guardian interchangeably.
When an absence triggers a notice the notice can be directed to parent-1 or parent-2 or parent-1 & parent-2. There is also a fourth option called preferred parent. A student can be configured to have a preferred parent contact and this could be either parent-1 or parent-2 (or you can simply move the preferred parent to parent-1 and send notices to parent-1).
You can re-import your Student and Parent information as often as you like. It is not necessary to import it everyday, however you may want to import it at the beginning of each term to update the changes to the student and parent information.
Absence information
If your roll marking is performed using a different system (not Sobs) then you can still import the absence information into Sobs for processing.
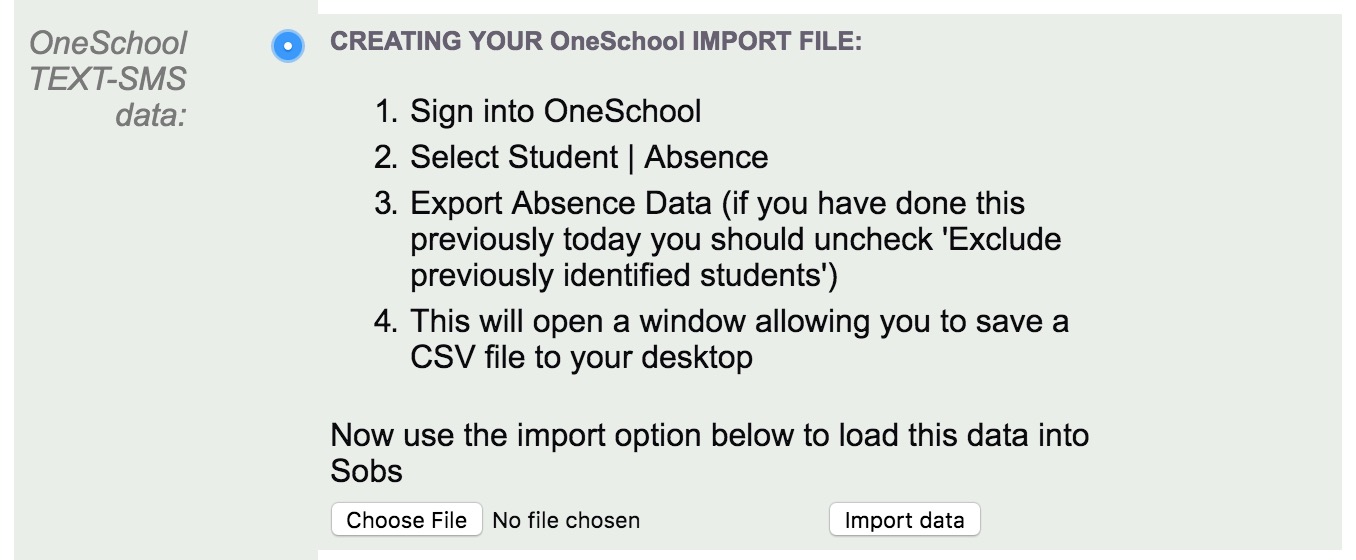 Use the ‘Import/Export’ page to import your absence information exported from your roll marking application.
You can re-import absence information – Sobs will always look for current absence detail to update. When we import an absence record Sobs records this as an absence for the entire day – depending on the information provided by the SM system. If you re-import an absence record for this same date the current absence detail will be updated.
OneSchool NOTE: There is an additional import option for schools using OneSchool. These schools may import an SMS/text file – this identifies students, dates of absence, and a mobile number that should be sent a message. In Sobs we treat these dates as full-day unexplained absences. We use the mobile number to update the preferred parent contact for each student.
Processing absence information
In order to process the absence information we must first configure a ‘notice’, a ‘trigger’, and then an ‘action’.
 The NOTICE: First create the notice you are wanting to generate and send. The content of the notice should be appropriate to the medium – if you are intending the notice to be sent via SMS then keeping the maximum length of the notice within 160 characters will improve efficiency (SMS messages are charged per 160 characters). You will likely include substitution tokens in your notice, these will be replaced by data from the student, parent, or absence record when the notice is being generated. For example, a token “%STUDENT-NAME%” will be replace by the student’s name. Some examples might be:
- %STUDENT-NAME% is absent from school today (%DATE%). Please reply with a reason for this absence
- %STUDENT-NAME% was not present during roll marking on %DATE%. Please reply with an explanation for this absence
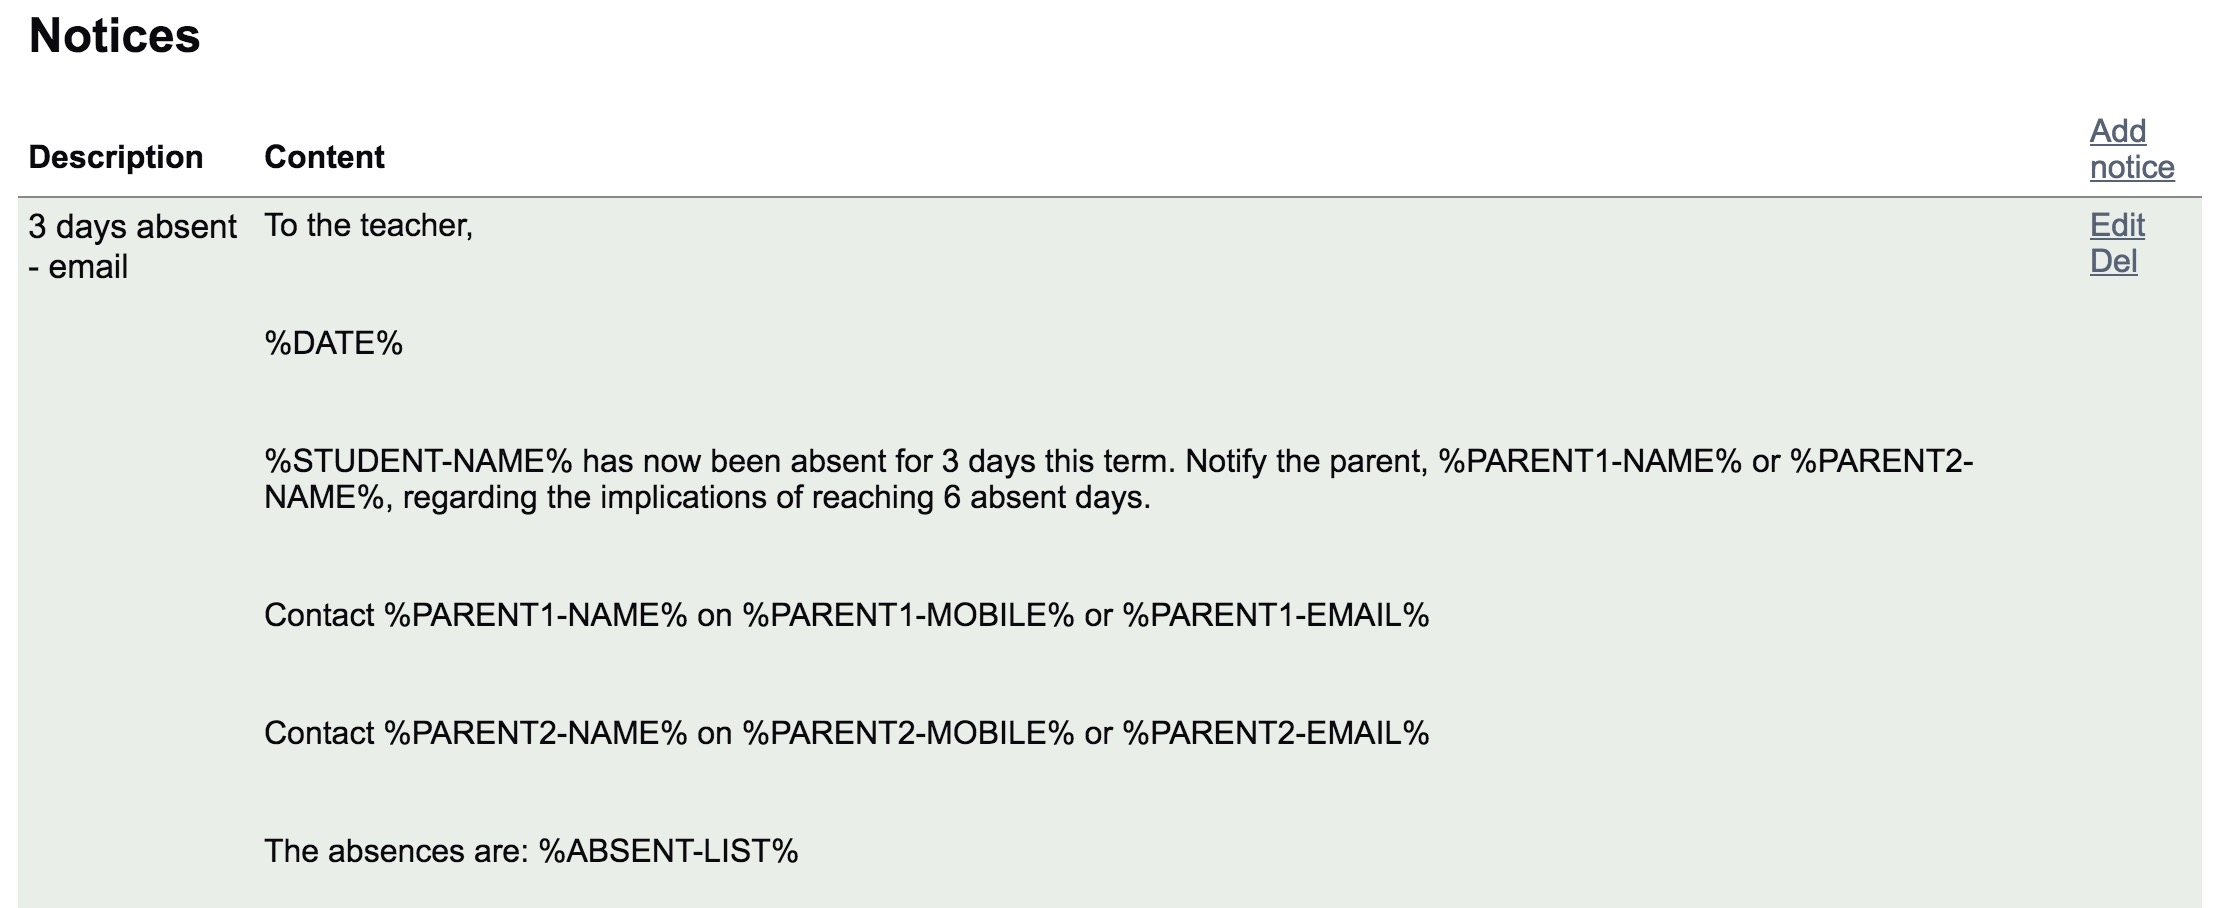 You can create additional notices, for example an email to the student’s form teacher is they have 3 days absent unexplained
 The TRIGGER: The trigger is a set of conditions that will determine when the notice is generated and sent. Essentially an absence is required in order to send a notification – and a simple trigger might indicate a single day absence of any type, this would be fired when any absence is found. Often we only want to send a notice on an ‘Unexplained’ absence, so you can select ‘Unexplained’ as one of the conditions to generate the notice. You can also specify 1 day or a number of days, and in the case where the absence is a number of days you can add the option of ‘cumulative’ or ‘consecutive’ to this condition.
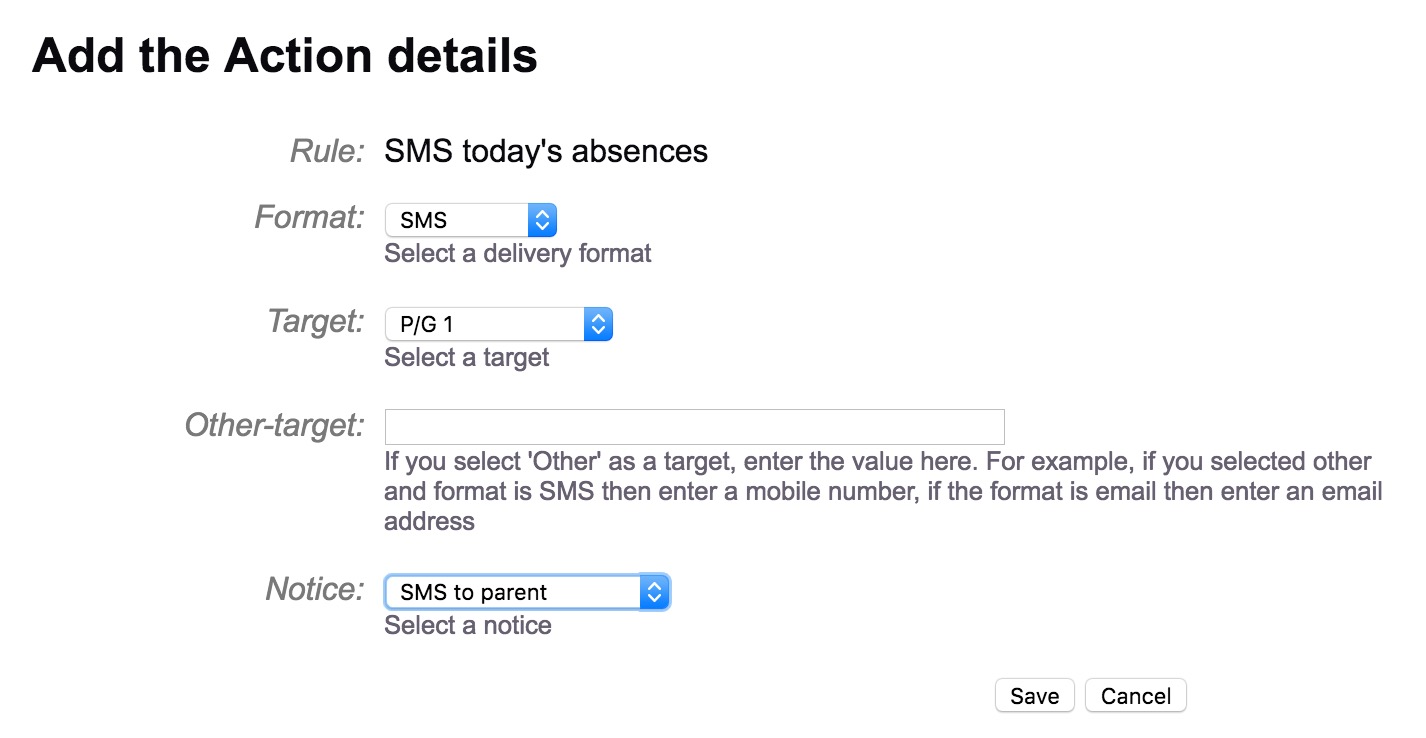 The ACTION: When a trigger fires it can generate a number of actions – there might be a number of notices to be sent. However in general most triggers will only have a single action, and that would be to generate a selected notice to a recipient via a particular medium. The action will define which notice is to be processed, who will receive the notice, and how it will be sent (via email or SMS etc).
When we process an ‘Action’ we record this detail against the absence. By default the system will never send the same notice about the same absence twice. We do however allow the operator to re-process a notice if required.
Calendar configuration
 As part of absence processing, we also check that we are processing on school days. This requires us to configure the terms and the in-term holidays. Click on the ‘Calendar’ link in the Configuration menu and add terms and holidays as necessary.
When adding a holiday you will also have the option of applying this to particular year levels. This can be useful for secondary schools at the end of the school year, where year12 students finish up a few weeks early, and year11 students also finish before the remaining students. You can configure these as year level holidays in the calendar, and this will avoid processing absence detail for these students. Your decision to process / not-process absences for these students may need to be made by your DP, Principal or Education Department.
When you have added the terms and holidays click the ‘Publish’ link to store these settings for processing.
That is the end of the configuration phase – all of the information is now ready to process some absences.